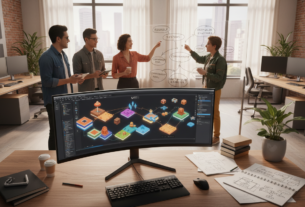
Welcome to this comprehensive guide where we’ll build a complete puzzle game from the ground up. This tutorial focuses on creating a popular tile-matching experience similar to well-known titles like Bejeweled and Candy Crush.
Our approach uses a unique architectural method that strictly separates game logic from visual presentation. This powerful technique allows you to easily switch visual themes while keeping core gameplay mechanics consistent and reliable.
You’ll learn how to implement hot reload functionality, which lets you modify and test code changes without stopping the game. This dramatically speeds up your development workflow and makes debugging much more efficient.
We’re targeting the latest stable version of the engine to ensure compatibility with modern features while maintaining production-ready stability. This guide is perfect for intermediate developers who understand basic C# programming and want to dive deep into puzzle game mechanics.
By the end, you’ll have a fully functional game with tile swapping, match detection, collapse mechanics, bonus features, and smooth animations—all built completely from scratch without relying on any pre-made assets.
Key Takeaways
- Build a complete tile-matching game without using any pre-made assets
- Learn a unique architectural approach that separates logic from visualization
- Implement hot reload functionality for faster development and testing
- Create core mechanics including tile swapping and match detection
- Develop collapse systems and bonus features from scratch
- Work with the latest stable version of the game development engine
- Gain deep understanding of puzzle game architecture patterns
Introduction to Building a Unity match-3 clone
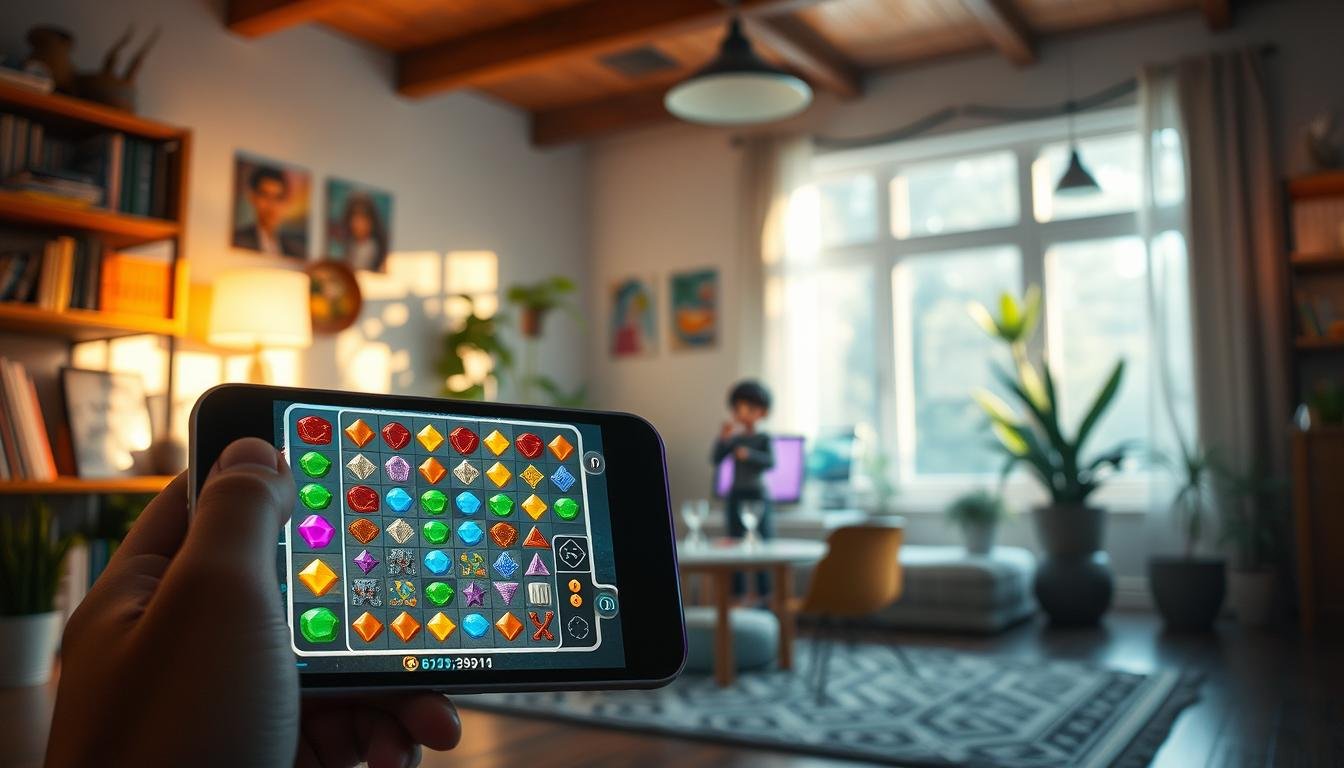
This section kicks off our hands-on journey into constructing the core of a popular puzzle experience. Tile-matching games are a cornerstone of casual gaming. Titles like Bejeweled and Puzzle Quest show the genre’s lasting appeal.
The core loop is simple but engaging. Players swap adjacent pieces to form lines of three or more identical tiles. These matches then clear from the board, making room for new pieces to fall into place.
Our tutorial uses a unique architectural approach. We will strictly separate the game logic from the visual presentation. This creates a flexible system where you can change visual themes without altering the gameplay code.
This separation adds a small layer of complexity. However, these types of games are relatively simple. We don’t need to worry about performance overhead.
We start by setting up a clean project. You only need a camera at (0, 0, -10) for the 2D XY plane, a main light with shadows disabled, and a global post-FX volume. This is a great way to begin.
Thoughtful code organization early on pays big dividends. You will see how this approach helps as your project grows in complexity. This method makes the entire development process smoother.
Why Create a Match-3 Game Clone in Unity?
Building your own tile-matching game offers numerous benefits beyond just creating entertainment. This type of project serves as an exceptional learning platform that covers multiple development disciplines in one cohesive package.
These puzzle games combine grid-based systems, state management, and user input handling. You’ll work with animation systems and complex game logic simultaneously. This comprehensive approach builds well-rounded development skills.
The engine provides powerful 2D tools perfect for prototyping and deployment. You can target mobile, web, and desktop platforms with minimal adjustments. This flexibility makes it ideal for testing concepts quickly.
Creating from scratch teaches valuable architecture patterns. You’ll understand how to separate data models from presentation layers. This knowledge applies to many other game genres beyond puzzle experiences.
The genre offers endless innovation opportunities through special tiles and power-ups. You can experiment with level design and progression systems. This foundation supports creative expansion and personalization.
Working without purchased assets develops crucial resource management skills. You’ll learn procedural generation and performance optimization techniques. These are often hidden in asset-heavy projects.
This clone makes an impressive portfolio piece demonstrating complex implementation abilities. It shows you can create polished experiences with maintainable code. The project showcases both technical and creative capabilities effectively.
Setting Up Your Unity Environment for a Match-3 Project
Before diving into core mechanics, establishing a clean project structure is essential. Start by duplicating an existing 2D template or creating a fresh project in the latest engine version.
Remove all unnecessary components to create a focused workspace. Keep only the essential elements: a main camera, primary light source, and global post-processing volume.
Configuring Camera and Scene Settings
Proper camera setup is crucial for 2D projects. Set your main camera’s position to (0, 0, -10) with zero rotation. This placement ensures optimal viewing of the XY plane where your tiles will exist.
Disable shadow casting on your main light source. This optimization improves performance, especially important for mobile devices. The clean visual style works perfectly for puzzle experiences.
Optimizing Unity 2022.3.2f1 for Prototyping
Organize your project with logical folder structures from the beginning. Create separate directories for Scripts, Prefabs, Scenes, and Materials. This organization pays dividends as your codebase grows.
Retain UI text prefabs for future score displays and move counters. The global post-FX volume allows subtle visual enhancements like bloom effects. These touches elevate even simple geometric shapes.
A well-prepared environment streamlines your entire development process. You’ll spend less time troubleshooting and more time building engaging mechanics.
Project Structure and Zero Asset Approach
Let’s dive into the practical side of our project by establishing a clean, asset-free foundation. Our “zero asset” approach means we create all visuals using built-in primitives rather than external art.
This method eliminates dependencies on asset store purchases. You build everything from basic geometric shapes using procedural techniques.
We construct seven distinct tile types using simple cube primitives. Each tile measures one unit square with 0.2 unit thickness, positioned cleanly on the XY plane.
Every tile prefab maintains identity transformation at its root game object. This means zero rotation and scale of one, preventing transformation bugs.
Visual distinction comes first through shape variations using different cube arrangements. We then apply color coding while ensuring colorblind accessibility.
This approach teaches fundamental development principles: you don’t need expensive assets to prototype compelling gameplay. By building from primitives, you maintain complete control over your game’s appearance.
The modular prefab structure allows easy expansion later. Adding new tile types becomes as simple as creating another prefab variant.
Understanding the Separation of Game Logic and Visualization
Now we’ll explore a powerful architectural pattern that separates visual presentation from core mechanics. This approach lets you swap entire visual themes without touching your gameplay code.
The Match3Skin component acts as your intermediary layer. It manages communication between your game state and visual tiles while keeping them completely independent.
Decoupling Game Logic with Match3Skin
This component follows the Model-View-Controller pattern beautifully. Your core game logic becomes the model, while Match3Skin serves as the controller.
The skin exposes simple properties like IsPlaying and IsBusy. External systems can check these to understand the current game state without accessing internal logic.
This separation makes collaboration much smoother. Visual artists can modify appearances while programmers work on mechanics independently.
Implementing Hot Reload for Easier Debugging
Hot reload support is built directly into this architecture. You can modify code while the game runs and see changes instantly.
The system carefully manages object references and pools. When code recompiles during play, it detects destroyed references and handles reconstruction gracefully.
In the editor, the system checks if pooled instances were destroyed. It clears invalid references to prevent errors on subsequent play sessions.
This approach also enables A/B testing different visual styles. You can create multiple game modes that share the same underlying mechanics with unique presentations.
Creating the Match3Skin Component and Game Controller
Building the central nervous system of our game begins with two essential components. The Match3Skin acts as our visual interface layer, while the Game component serves as the main controller.
We start with simple stub implementations for the Match3Skin. The IsPlaying property returns true, and IsBusy returns false. We also create public void methods StartNewGame() and DoWork() that do nothing initially.
Our Game component manages the overall flow and coordinates between systems. It contains a configuration field for the Match3Skin reference. When the scene loads, the Awake method calls match3.StartNewGame() to initialize the game state.
The Update loop implements a clean state machine. If the game is playing and not busy, it handles player input first. Then it always calls DoWork() to process pending logic.
When not playing, pressing space triggers a new game. This provides quick restart functionality during testing. Input handling goes to a separate method that tracks mouse states and drag positions.
The EvaluateDrag method receives screen coordinates and returns a boolean. This lets the skin determine valid moves based on game rules. This separation keeps input detection clean from processing logic.
This architecture creates a responsive, maintainable system. The public static elements work together to manage the complete game experience efficiently.
Designing and Pooling Tile Prefabs Effectively
Our attention now turns to optimizing tile performance through intelligent prefab pooling. This technique prevents performance issues when creating and destroying hundreds of tiles during gameplay.
We create a generic PrefabInstancePool struct that wraps a stack. This reusable system works with any MonoBehaviour prefab type. The pool isn’t serializable but handles instantiation efficiently.
The public void GetInstance method checks if a pool exists first. It creates one if needed, then reuses available instances. When recycling, it deactivates the game object and returns it to the pool.
Establishing Unique Tile Components
Hot reload support requires special handling. The system checks if pooled references point to destroyed objects. If so, it clears the pool to prevent null reference errors.
We create a Tile component using this pooling system. It includes Spawn and Despawn methods that handle position assignment. Each method becomes a simple one-line operation.
Adding this component to all seven prefabs ensures consistent behavior. Each tile type maintains its unique appearance while sharing efficient pooling mechanics. This approach eliminates garbage collection spikes during intense gameplay.
Building a 2D Grid System for Gameplay Mechanics
A robust grid system forms the backbone of any tile-based puzzle experience. We’ll create a generic Grid2D struct that handles all spatial organization for our game. This flexible structure works with any data type you need.
The constructor takes an int2 size parameter representing rows and columns. It initializes an internal array with the exact length needed: size.x multiplied by size.y. This establishes fixed dimensions that won’t change during gameplay.
Public getter properties provide safe access to grid dimensions. You can check Size, SizeX, and SizeY without risking accidental modification. The IsUndefined property detects uninitialized grids, which is crucial for hot reload support.
Two indexer overloads offer flexible access patterns. Use separate row and column int values or a single int2 coordinate. The system converts 2D coordinates to 1D array indices using the formula: row times width plus column.
The AreValidCoordinates method prevents out-of-bounds errors. It checks if both row and column values fall within grid boundaries before any access attempts. This validation ensures stable operation throughout your game.
The Swap method uses modern tuple syntax for clean element exchange. It takes two coordinate pairs and swaps their values in one elegant operation. This avoids temporary variables and makes the code intention crystal clear.
We also create a TileState enum with seven lettered states (A through G) plus None for empty spaces. Both your game logic and visual skin will use identical Grid2D structures, maintaining perfect synchronization between systems.
Techniques for Avoiding Immediate Matches in Grid Initialization
A flawless game start is crucial, and our next step ensures the player, not the board, makes the first move. Beginning with pre-existing matches creates a poor experience. Players should trigger the first chain reaction themselves.
Our FillGrid algorithm must prevent both horizontal and vertical matches during creation. It checks neighbors for each new tile placement. This avoids any automatic clears before gameplay even starts.
Algorithm to Prevent Horizontal and Vertical Matches
The process scans the grid from the bottom-left corner, moving through each row and column. For every position, it looks at the two tiles to the left. If those two are identical, it notes their type as a forbidden value.
The algorithm then checks the two tiles directly below the current spot. If they also match, it records a second forbidden type. This way, we track up to two tile types that would cause an immediate match.
The random selection logic then cleverly avoids these forbidden types. It adjusts the random range based on how many potential matches it found. This ensures the chosen tile won’t complete a line of three.
This elegant solution maintains balanced probability across all valid tile types. It guarantees a clean, playable board every time a new game begins.
Handling Player Input and Drag Mechanics in Unity
Now let’s focus on player interaction by implementing responsive drag mechanics. Our tile-swapping puzzle experience needs intuitive controls that feel natural to players. The input system converts screen touches into precise grid movements.
We implement a three-state approach for drag detection. First, we track when the mouse button presses down to start a drag. Then we monitor the ongoing movement while the button stays held. Finally, we handle the release to complete the action.
The system uses two key variables: dragStart position and isDragging boolean. These prevent multiple simultaneous operations and maintain clean game state. Each drag operation processes one tile swap at a time for clarity.
Our EvaluateDrag method takes start and end positions in screen space. It converts these to tile coordinates using camera raycasting. This projection maps screen touches accurately to grid positions.
The method calculates direction by comparing position deltas against a threshold. We use 0.5 tile units as the minimum movement required. This prevents accidental swaps from tiny mouse movements.
A switch expression maps the drag delta to cardinal directions. It returns Up, Right, Down, Left, or None if movement is insufficient. This creates concise, readable code for direction detection.
When a valid move is identified, the method executes the swap operation. It then returns false to terminate the drag gesture. This prevents single gestures from triggering multiple moves.
The HandleInput method coordinates this entire process. It checks the dragging state and calls EvaluateDrag when appropriate. This separation keeps input handling clean from game logic.
Executing Tile Swaps and Move Operations Clearly
Creating reliable move validation ensures players experience smooth, predictable interactions. Our system needs to handle tile swaps with precision while maintaining data integrity throughout the process.
Leveraging Public Methods and Enum Directional Moves
We begin with a MoveDirection enum containing Up, Right, Down, Left, and None values. This eliminates magic numbers and makes code self-documenting. Each direction corresponds to specific coordinate transformations.
The Move struct encapsulates swap operations cleanly. Its constructor takes starting coordinates and direction, then calculates destination positions. The IsValid property checks if direction != None, simplifying conditional logic.
Our TryMove method serves as the main validator. This public void method performs the swap and returns success status. It uses the ShapesArray.Swap method which creates backups before modifying positions.
The Swap method handles the actual tile exchange. It stores both GameObjects, gets their array indexes, and swaps them. Then it updates each shape’s int row and column properties to maintain consistency.
UndoSwap implementation is elegantly simple—just call Swap again with backup references. This demonstrates how thoughtful design enables easy reversal when moves don’t create valid matches.
Developing the Matching Logic and Collision Detection
Identifying connected tiles requires systematic scanning across the game board dimensions. Our detection system uses two complementary methods that work together to find valid combinations.
The GetMatchesHorizontally method scans left and right from a starting position. It checks each column while moving in both directions. The process continues until it finds non-matching tiles or reaches the grid boundary.
Similarly, GetMatchesVertically examines tiles above and below the starting point. It moves through rows in both directions to build a complete vertical match list. Both methods always include the starting game object in their results.
The system enforces a minimum match requirement of three tiles. If fewer matches are found, the methods return an empty list. This prevents small, invalid combinations from triggering game events.
When special bonus tiles are detected, the matching logic expands dramatically. The system calls GetEntireRow or GetEntireColumn to include every tile in that dimension. This creates satisfying chain reactions that clear large board sections.
The GetMatches method efficiently handles both single tiles and collections. It uses Distinct() to eliminate duplicate references where match regions overlap. This ensures accurate scoring and prevents processing errors.
Incorporating Animations and Game State Transitions
The visual polish of your tile-swapping creation depends heavily on well-timed animations and clear state management. These elements transform basic mechanics into an engaging player experience.
Proper animation sequencing prevents confusing visual glitches. Your game board should never change while animations play. This separation ensures players can track what’s happening clearly.
Smooth Tile Drop and Clear Animations
The void Update method handles tile movement during falling states. Each tile knows its target position and moves toward it using frame-rate independent calculations. This creates consistent animation speed across different devices.
When tiles reach their destination, they signal completion. The system then checks for new matches automatically. This cascade effect continues until the board stabilizes.
Enhancing Feedback with Dynamic Animation Effects
Game state transitions control when players can interact with the board. During animation sequences, input gets disabled. This prevents race conditions and maintains clean game flow.
Sound effects synchronized with animation completion provide satisfying feedback. Centralized timing constants allow easy adjustment of the overall game feel. This approach creates professional-quality visual polish.
Integrating Bonus Features and Special Candy Effects
Strategic depth in tile-matching games comes alive through well-designed bonus features. These special abilities reward players who create larger matches with powerful effects that can clear entire rows or columns.
The BonusType enum uses the [Flags] attribute, allowing a single tile to carry multiple bonus types. This flexible system supports future expansion while maintaining clean code structure.
Bonus creation follows specific rules to maintain skill-based gameplay. Only matches of four or more tiles created directly by player swaps generate special tiles. Cascading matches don’t create bonuses, ensuring deliberate actions are rewarded.
Each bonus candy maintains the same color as its original tile type. This visual consistency helps players understand which tiles will be affected when the bonus activates. The system uses a bool check to determine if a match contains bonus tiles.
When a match includes a bonus tile, the ContainsDestroyRowColumnBonus method detects it. Depending on match orientation, either GetEntireRow or GetEntireColumn is called. This dramatically expands the destruction area beyond the original match.
The MatchesInfo class tracks BonusesContained separately from matched tiles. This allows coordinated processing of regular matches and bonus effects in distinct phases. You can also add new bonus types with minimal code changes.
This bonus system creates exciting gameplay moments while maintaining clean architecture. Players enjoy the strategic possibilities, and developers appreciate the extensible design that supports future feature additions.
Final Thoughts on Crafting a Dynamic Unity match-3 clone
The journey from empty project to polished game demonstrates the power of systematic development approaches. You’ve built a complete puzzle experience from scratch, understanding every line of code. This knowledge transfers to any grid-based project you tackle next.
The architectural pattern separating game logic from visualization provides a template for maintainable systems. Your Grid2D class and object pooling techniques show how to organize complex state in clean containers. The bonus system implementation demonstrates extensible design thinking.
This tutorial has given you more than just a working game—it’s provided a development methodology. Start with clean architecture, build incrementally, and always design for future expansion. The foundation you’ve created supports endless customization possibilities.
Remember to refine through playtesting. Adjust animation durations by tweaking float values in your Constants class. Tune drag thresholds and add visual polish. Your completed project stands as a solid portfolio piece showcasing professional development skills.