Welcome to this comprehensive guide on creating a dynamic movement system for your projects. This tutorial provides a complete walkthrough for implementing a rapid burst of speed feature. You will learn to build this system for both 2D and 3D environments.
Movement abilities are crucial for modern game design. They give players enhanced control and open up new strategic possibilities. This guide will show you how to create a polished and functional system from the ground up.
We will start with the core setup, then move into scripting and adding visual flair. Each part builds on the last. By the end, you will have a deep understanding of the entire process.
This guide assumes you have a basic knowledge of the Unity Editor and C# scripting. Following these steps will equip you to add a responsive and engaging movement ability to your own creations.
Key Takeaways
- This guide covers creating a rapid movement ability for both 2D and 3D projects.
- You will learn the entire process from initial setup to final polish.
- This feature enhances player control and adds strategic depth to gameplay.
- The tutorial is structured to build your knowledge step by step.
- Basic familiarity with Unity and C# is recommended to follow along successfully.
- Key concepts include physics, input handling, and timing systems.
Introduction to Dash Mechanic in Unity
The core concept of instantaneous velocity application forms the foundation of effective movement mechanics. This system creates rapid bursts that significantly enhance character mobility. Understanding these principles is crucial for modern game development.
This movement ability works by applying immediate force to a physics-enabled object. The system relies on Rigidbody components and proper collision detection. These elements work together to create smooth, responsive directional bursts.
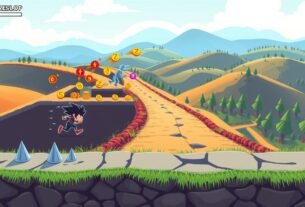
Regular movement differs from this rapid technique in its acceleration pattern. Standard movement builds up speed gradually, while the burst approach provides instant velocity. This distinction creates unique gameplay opportunities and strategic depth.
Proper timing controls prevent ability spam and maintain game balance. Cooldown periods and duration limits ensure fair gameplay. These configurable parameters allow designers to fine-tune the experience.
This introduction establishes the technical foundation needed for implementation. The upcoming sections will build upon these core concepts. You’ll learn to create a polished, functional movement system for your projects.
Setting Up Your Unity Project
Establishing your development environment correctly is the first critical step. This section guides you through creating a new 2D project and preparing the basic scene structure. Following these steps in the right order ensures a smooth workflow.
Creating a New 2D Project
Open Unity Hub and click the “New Project” button. Select the 2D core template and name your project “unity 2d dash.” This creates a blank canvas ready for development.
Proper project configuration from the start prevents issues later. The 2D template automatically sets up important rendering settings. This foundation makes implementing movement systems much easier.
Basic Scene Setup and Environment
Create your player character by making a simple sprite. Right-click in the Assets panel, navigate to Create > Sprites > Square. Rename this asset to “player” for clear organization.
Drag the player square from Assets into your Hierarchy view. This adds the object to your scene. A clean hierarchy structure helps manage game objects efficiently.
Set up a basic background using colored squares or simple shapes. This testing environment lets you visualize movement clearly. Organized scene preparation streamlines the development process.
Your project now has the essential elements needed to start building. The next section will focus on configuring the player object with physics components. This groundwork ensures everything works together properly.
Creating and Configuring Your Player Object
The player object serves as the primary interactive element in any gaming experience. Proper configuration ensures smooth movement and responsive controls. This setup forms the foundation for implementing advanced movement systems.
Adding Sprites and Game Objects
Begin by selecting your character’s visual representation. Choose a sprite that clearly represents your player. Configure the rendering order to ensure proper visual hierarchy.
Adjust the sprite properties to match your game’s aesthetic. Proper sizing and positioning help create a polished appearance. These visual settings establish your character’s identity.
Setting Up Rigidbody and Colliders
Add a Rigidbody2D component to enable physics interactions. This component handles movement forces and responses. Select the Kinematic body type for controlled character movement.
Attach a Box Collider 2D to define collision boundaries. Adjust the collider size to match your sprite dimensions precisely. This ensures accurate collision detection during gameplay.
Test your configuration by entering Play mode. Verify that gravity effects are controlled and collisions work correctly. These components work together to create a stable foundation for movement systems.
Writing the Basic Movement Script>
Building responsive character movement begins with writing clean, efficient code. This foundation establishes the core control system for your player character. Proper script structure ensures smooth gameplay and easy future enhancements.
Start by creating a new C# script named “DashMove” in your Assets folder. Attach this component to your player object to enable movement control. This script will handle all input processing and physics interactions.
Implementing Unity’s Input System
The input system detects player commands and translates them into actions. Use Input.GetKey() to check for arrow key presses during each frame update. This method provides immediate response to directional inputs.
Continuous checking in the Update() method ensures real-time control. The system monitors all four cardinal directions simultaneously. This approach creates fluid movement across different hardware configurations.
Understanding Rigidbody2D for Movement
Direct velocity manipulation offers precise control over character movement. Setting body.velocity creates instant response to player input. This method differs from applying gradual forces.
Multiply movement speed by Time.deltaTime for consistent performance. This calculation maintains uniform speed across varying frame rates. The result is reliable movement regardless of system capabilities.
Establishing this basic control system prepares for advanced features. The current structure supports easy integration of additional mechanics. This foundation enables responsive gameplay experiences.
Enhancing the Script with Dash Functionality
Implementing rapid directional bursts involves extending the existing movement framework with timing controls. This upgrade transforms basic character navigation into a dynamic movement system.
The enhanced script requires careful state management and precise timing mechanisms. These elements work together to create responsive directional bursts.
Introducing Dash Variables and Timers
Create a DashDirection enum with values for Left, Right, Up, Down, and NoDirection. This approach improves code readability and organization.
Define key variables including dashSpeed for velocity intensity and dashDuration for time limits. The dashTimer tracks elapsed time during active bursts.
Programming Directional Input for Dashing
Modify the input system to detect arrow key presses for directional bursts. The script sets the appropriate direction based on player input.
When a direction is active, the timer increments using Time.deltaTime for consistent timing. Apply velocity using Vector2 constants multiplied by the speed value.
The system resets direction and velocity when the timer exceeds the duration threshold. This prevents unintended movement after the burst completes.
Debugging and Tuning Your Dash Mechanic
Tuning the directional acceleration ability demands precise parameter adjustments and thorough testing. This phase transforms your basic implementation into a polished gameplay feature.
Adjusting Dash Duration and Speed
Begin testing with moderate values for movement intensity and time limits. A good starting point is 15 units per second for velocity and 0.3 seconds for the active period.
Use the Unity Inspector to modify these values during Play mode. This allows real-time feedback on how changes affect gameplay feel. Adjust the speed parameter to control how far your character travels.
The duration setting determines how long the acceleration effect lasts. Shorter times create quick bursts, while longer periods enable sustained movement.
Trouggleshooting Common Errors
If your character continues moving after the ability should end, check the timer reset logic. Ensure the timing variable properly clears when reaching the duration limit.
For inconsistent behavior across different frame rates, verify Time.deltaTime usage in calculations. Add Debug.Log statements to track variable states during execution.
Collision issues during high-speed movement may require adjusting physics settings. Test your system in various scenarios to identify edge cases.
These debugging techniques help create a reliable and responsive movement system. Proper testing ensures consistent performance across different gameplay situations.
dash mechanic unity Best Practices for 2D Games
Polishing your movement system requires attention to both technical configuration and visual presentation. These elements work together to create a professional gaming experience.
Optimizing Configurable Properties
Expose key variables in the Inspector using SerializeField attributes. This approach allows designers to adjust behavior without code changes.
Make speed, duration, and cooldown values easily accessible. Team members can fine-tune these parameters during testing. This creates a flexible development workflow.
Incorporating Visual and Particle Effects
Add particle systems that activate during movement execution. Dust clouds or speed trails enhance the feeling of velocity.
Create prefabs with optimized emission rates and color gradients. Trigger these effects precisely when the ability begins. This synchronization ensures visual feedback matches gameplay.
Balance spectacle with clarity to maintain gameplay visibility. The right effects make movement feel responsive without distracting players.
Extending the Dash Mechanic to 3D Gameplay
Transitioning your rapid movement system into three-dimensional space requires minimal modifications to the existing framework. The core logic remains consistent across both environments.
Begin by creating a new 3D scene in your project. Change the camera settings from Orthographic to Perspective view. This adjustment properly displays depth relationships in three-dimensional space.
Adapting from Rigidbody2D to Rigidbody
The primary difference between versions involves physics components. Replace all Rigidbody2D references with standard Rigidbody in your code.
Configure the 3D Rigidbody with appropriate settings for character control. The kinematic option ensures predictable movement behavior. This maintains the same responsive feel from the 2D version.
Switching from Vector2 to Vector3
Update all vector references from two-dimensional to three-dimensional space. Change Vector2 instances to Vector3 throughout your movement script.
The directional calculations work identically but now include Z-axis movement. Your character gains full volumetric mobility while retaining the original speed and timing parameters.
These simple changes demonstrate the flexibility of your implementation. The underlying mechanics transfer seamlessly between dimensional contexts.
Additional Tips and Optimization Strategies
Optimizing your movement system requires careful attention to physics interactions and collision handling. These advanced techniques ensure your implementation performs reliably across different gameplay scenarios.
Fine-tuning Physics and Collision Responses
Adjust physics settings like drag and interpolation to prevent unwanted sliding after movement execution. Proper configuration maintains character control during high-speed sequences.
Implement continuous collision detection to handle rapid movement through complex environments. This approach prevents tunneling through thin walls or obstacles.
Use collision layer management to control interactions with different game objects. This system ensures your movement ability works correctly with various terrain types.
Cache component references and minimize per-frame calculations for better performance. These optimizations maintain smooth gameplay during intense action sequences.
Consider platform-specific adjustments for different devices. Mobile systems may require different timing values than PC versions. Test your implementation across target platforms.
Integrating the Dash Mechanic into Your Game Project
The final phase of development focuses on embedding your acceleration ability within the larger project framework. This integration ensures your movement system works seamlessly with existing character controllers and game management structures.
Design your code to be modular for different character types. Each hero can have unique speed values and duration settings. This approach creates diverse gameplay experiences.
Connect the movement mechanics with animation systems for visual feedback. Character states should properly reflect when the ability is active. This synchronization enhances player immersion.
Implement UI elements to track cooldown status and available uses. Players need clear indicators showing when they can execute the next burst. Visual feedback improves gameplay clarity.
Add sound effects that trigger during execution for audio reinforcement. Proper audio cues make the ability feel more responsive and impactful. These elements work together to create a polished final product.
Thorough testing ensures all systems interact correctly without conflicts. Document your implementation for team collaboration and future reference.
Conclusion
You now possess the complete toolkit for implementing a dynamic movement ability in your games. This journey has covered essential components from physics systems to timing controls.
The same core principles apply whether developing for 2D or 3D environments. Your foundation in Rigidbody physics and input handling creates versatile movement systems.
Experiment with the parameters you’ve learned to match your specific vision. Adjust speed values and duration settings to achieve the perfect feel for your game.
Remember that iterative testing and player feedback are crucial for refinement. These practices ensure your movement mechanics feel responsive and balanced.
Consider extending your basic system with advanced features like aerial bursts or directional variations. Your new skills open doors to more complex gameplay possibilities.
You’ve progressed from initial setup through advanced optimization strategies. Apply this knowledge to create engaging experiences that captivate players.
FAQ
What is the main difference between a basic movement and a dash in a game?
How do I prevent the player character from dashing through walls?
Can I add a visual effect, like a trail, when the dash is active?
What is the purpose of a timer in the dash script?
Is it better to use a force or directly change the velocity for the dash?
How can I make the dash direction match the player’s input?

Game developer with over 10 years of professional experience specializing in the mobile sector. George’s journey began with a passion for indie development, leading him to contribute to several successful mobile titles, including the critically acclaimed puzzle-platformer ChronoShift and the top-down strategy game Pocket Empires.