Creating responsive touch interactions is essential for modern game development. Players expect intuitive controls that feel natural on their devices. This guide will help you build engaging experiences that take full advantage of touchscreen capabilities.
The touch system in Unity tracks each finger individually. This gives you precise control over how players interact with your creation. You can monitor properties like position, phase, and tap count.
Since Unity 2019.2, touch is no longer detected as mouse clicks. This important change means projects need proper updates. Understanding these differences will help you create better mobile experiences.
Key Takeaways
- Touch controls create natural and intuitive player interactions
- Unity’s system tracks individual finger inputs with precision
- Modern versions handle touch separately from mouse input
- Multiple touch properties enable creative control schemes
- Proper implementation makes games feel native to mobile platforms
- These techniques work for various game genres and styles
Getting Started with Mobile Touch Input in Unity
Effective touch-based gameplay relies on understanding how the engine processes screen interactions. The input system tracks each finger separately, giving you precise control over player actions. This foundation is essential for creating responsive experiences.
Understanding the Touch System Fundamentals
The touch framework monitors individual finger contacts with detailed data. Each interaction contains properties like position, phase, and finger identification. You access this information through the Input.touchCount property and Input.GetTouch method.
This approach allows you to handle multiple simultaneous touches accurately. The system provides real-time updates as players interact with your game. Understanding these fundamentals is crucial for building effective control schemes.
Exploring Touch Phases and Screen Interaction
There are five distinct touch phases that define user interactions. Began occurs when a finger first contacts the screen. Moved tracks sliding motions while maintaining contact.
Stationary captures moments when fingers pause without lifting. Ended signals when contact is broken. Cancelled handles system-interrupted tracking. Your script responds differently to each phase type.
Testing on physical devices gives the most accurate feel for how controls will perform. Emulators provide convenient alternatives during development. Proper phase handling creates natural-feeling interactions.
Essential Scripting Techniques for Touch Input
Building responsive touch mechanics requires understanding essential coding patterns. These techniques transform basic screen interactions into meaningful gameplay responses. Let’s explore practical approaches that bring your touch features to life.
Setting Up Touch Phase Display and UI Feedback
Creating a TouchPhaseDisplay script helps visualize touch interactions. This component shows real-time phase changes as players interact with the screen. You’ll need the UnityEngine.UI namespace for text display functionality.
The script stores touch data in variables and checks for active touches. When Input.touchCount exceeds zero, it retrieves the first touch and converts its phase to text. This approach provides immediate visual feedback during development.
This technique helps debug interactions and understand player behavior patterns. You can extend the basic script with timing variables for better information display.
Implementing Virtual D-Pad Controls
Virtual D-pads offer directional input without physical buttons. The script tracks touch start and end positions to calculate movement direction. It compares horizontal and vertical differences to determine the intended direction.
If horizontal movement dominates, the system returns left or right directions. Vertical dominance produces up or down responses. This control type feels natural for character movement and menu navigation.
You can enhance this basic implementation with visual feedback elements. Adding directional arrows or a text box showing active directions improves player experience. Both scripts demonstrate event-driven programming where code responds immediately to screen interactions.
Implementing Unity mobile controls in Your Game
Bring your game to life with professional on-screen interfaces that players can interact with naturally. The Input System package provides specialized components that simplify this process dramatically. These tools help you create responsive control systems without complex coding.
You can quickly add virtual interfaces that feel intuitive to players. The system handles the technical details while you focus on gameplay experience. This approach saves development time and ensures consistency across devices.
Integrating On-Screen Joysticks and Buttons
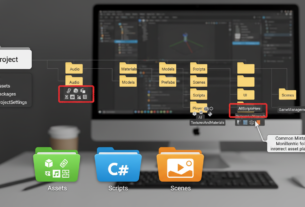
Start by creating a UI Canvas for your virtual control system. Add a circular image to represent your movement stick. Anchor this element to a screen corner for consistent placement.
Attach the On-Screen Stick component to your image. This script component manages all the touch interaction logic. Your character movement system will recognize the input immediately.
For action commands, create button images instead of using UI Button components. The On-Screen Button script component handles touch detection. This method creates responsive buttons that integrate seamlessly with your existing code.
Linking Control Paths to Input Actions
The control path system connects your on-screen elements to gameplay actions. Set the Control Path dropdown to match your Input Actions asset. This creates instant compatibility with your character controller.
Your movement system already understands Vector2 data from various sources. The on-screen stick provides the same data type as physical controllers. This flexibility means your game works across multiple input methods without code changes.
Map each button to specific actions like jump or attack. The control path organization keeps your code clean and manageable. Players enjoy consistent responsiveness regardless of their device.
Advanced Multi-Touch Techniques and Data Management
Advanced multi-touch techniques transform simple screen taps into sophisticated gesture-based commands. When your game detects multiple fingers simultaneously, it opens up creative possibilities for complex interactions. This approach takes full advantage of modern touchscreen capabilities.
Displaying Multi-Touch Information Effectively
The MultiTouchDisplay script demonstrates how to track several touch properties at once. It uses a for loop that cycles through all current touches, gathering valuable data from each finger individually. This method ensures you capture every interaction accurately.
Each touch carries a wealth of information about player behavior. The system provides position data, tap counts, and unique finger identification. This comprehensive tracking enables rich, responsive gameplay experiences.
Handling Tap Counts, Radius, and Finger IDs
Tap count tracking is perfect for games that reward rapid interactions. Imagine tracking personal bests in clicker games or triggering special moves with multiple rapid taps. The finger ID property helps distinguish between different fingers reliably.
Touch radius measures the contact area between finger and screen. Combined with radius variance, it can approximate pressure sensitivity. This feature works well for painting apps or physics puzzles that respond to touch intensity.
The input system maintains accurate tracking even when fingers lift sequentially. Understanding these advanced properties helps create innovative control schemes that feel natural on any device.
Final Insights on Enhancing Mobile Gameplay Experience
Your development efforts now position you to deliver exceptional on-screen interaction quality. The comprehensive knowledge you’ve gained transforms basic screen taps into sophisticated gameplay responses. This foundation supports virtually any control scheme your project requires.
Always test your interface on actual devices to ensure natural responsiveness. Position interactive elements where thumbs naturally rest for comfortable play. Visual feedback like button highlights confirms player input is registered correctly. Consider accessibility options for different hand sizes and abilities.
Your game project benefits from the Input System’s pre-built components that work across various screens. Continue experimenting with different configurations and gather player feedback. With these techniques mastered, your creation provides the intuitive experience players expect from quality touch-screen games.